Lighting Your Art: A Non-Technical Guide (Collector's Handbook)
How to light your art collection properly. Practical guidance for showcasing your pieces at their best.
By Austin Gallery
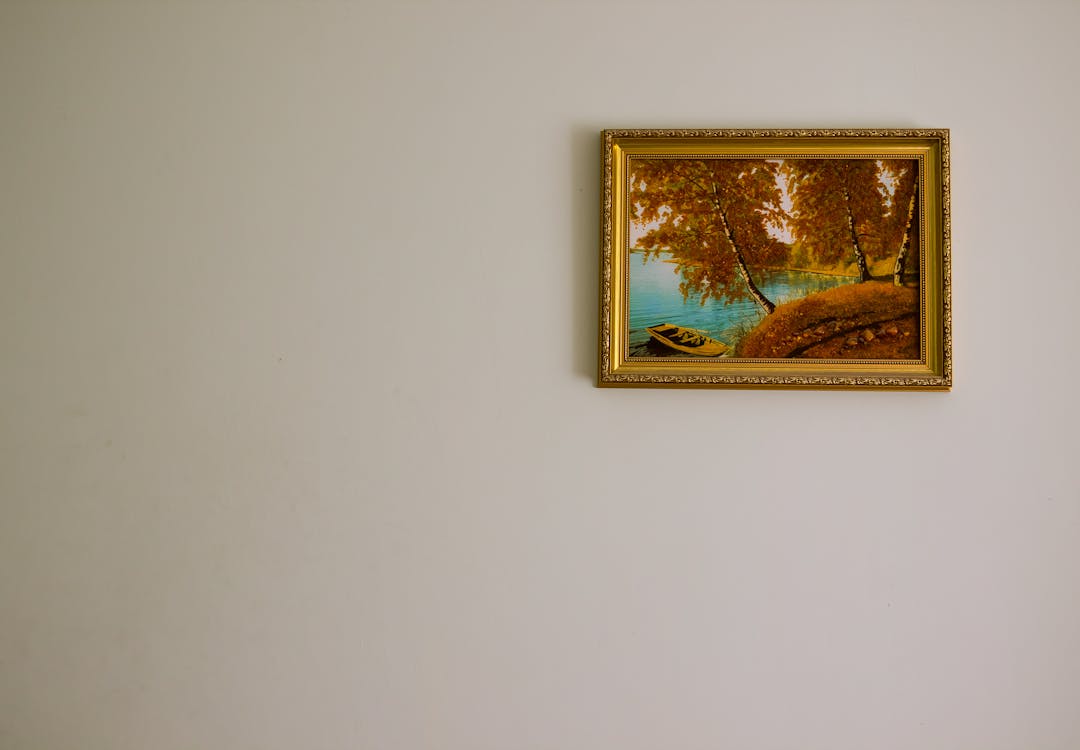
You have beautiful artwork on your walls, but something feels off. The colors look muted, there is an annoying glare across the glass, or worse, you hung a cherished painting in a sunny spot and the reds are starting to fade. Lighting art well is one of those things that seems like it should be simple, yet the difference between a piece that looks flat on the wall and one that stops you in your tracks often comes down to how light hits the surface. The good news: you do not need to be an electrician, an interior designer, or a museum curator to get this right. This guide walks you through practical, room-by-room strategies for lighting your artwork at home, from choosing the right wall for natural light to creating that coveted gallery glow with a few affordable fixtures.
The right light brings art to life — the wrong light can damage it permanently
Three main approaches: picture lights, track lighting, and recessed ceiling spots
Keep art away from direct sunlight and halogen bulbs — LED is the safest choice
If you are looking for specific product recommendations and budget breakdowns, head over to our complete guide to art lighting solutions under $200. This guide focuses on the design principles and decision-making that come before you buy a single light.
Start with Natural Light: Your Best Friend and Worst Enemy
Natural light is the gold standard for viewing art. Museums design entire wings around it. But in a home setting, natural light is unpredictable, shifts throughout the day, and can cause serious damage if you are not careful.
Where to Hang (and Where Not To)
The number one rule for placing artwork in a naturally lit room is straightforward: never hang art in direct sunlight. Direct sun hitting a painting, photograph, or print will fade pigments, yellow paper, and crack varnish faster than almost anything else. The Conservation Center for Art and Historic Artifacts emphasizes that light damage is cumulative and irreversible. Every hour of direct sun exposure does permanent harm.
The number one rule for placing artwork in a naturally lit room is straightforward: never hang art in direct sunlight.
That does not mean you need to hide your collection in a windowless basement. Instead, think about indirect light. North-facing walls in the Northern Hemisphere receive the most consistent, diffused natural light throughout the day, which is why artist studios have historically favored north-facing windows. East-facing walls get gentle morning light but avoid the harsh afternoon sun. West-facing and south-facing walls are the danger zones: they receive intense, direct sunlight during peak hours that will damage unprotected artwork over time.
If your favorite wall for a painting happens to face south or west, you have options. UV-filtering window film blocks the most damaging wavelengths while still allowing visible light through. Sheer curtains diffuse direct beams into softer, scattered light. And rotating your collection, moving sensitive works to interior walls during summer months, is a strategy that even small museums use.
Working with Daylight Throughout the Day
One of the pleasures of natural light is that it changes. A painting looks different at 8 a.m. than it does at 4 p.m. Lean into this rather than fighting it. Position artwork where it catches flattering indirect light during the hours you are most likely to enjoy it. If you spend evenings in your living room, a piece on a north wall that glows softly during golden hour is more rewarding than one on an interior wall you barely notice.
That said, supplement natural light with artificial lighting for the evening hours. The art that looks luminous at noon can disappear entirely after dark if you are relying on a single overhead ceiling light. This is where dedicated art lighting makes the biggest difference.
The Museum Look at Home: Angles, Distance, and the 30-Degree Rule
Walk into any well-designed gallery and the art seems to glow from within. That effect comes down to a simple geometry principle that lighting designers call the 30-degree rule, and it is remarkably easy to replicate at home.
Understanding the 30-Degree Angle
The idea is this: position your light source so the beam strikes the center of the artwork at approximately 30 degrees from vertical. At this angle, the light washes evenly across the entire surface from top to bottom, without creating a distracting hot spot at the top or casting the bottom of the piece into shadow. According to Lutron's guide to lighting artwork, this angle also minimizes glare on glass and varnished surfaces because it directs reflected light downward, below the viewer's eye line, instead of bouncing it straight back.
If you have art with heavy texture, like an oil painting with thick impasto brushwork, try dropping that angle to about 25 degrees. The slightly steeper approach rakes light across the surface and accentuates those ridges and shadows that give oil paintings their dimensional beauty. For flat works like photographs and prints behind glass, stay closer to 30 or even nudge up to 35 degrees to further reduce any chance of glare.
Distance from the Wall
For ceiling-mounted fixtures or track lighting on a standard 8-foot ceiling, position the light roughly 2 to 3 feet out from the wall. This distance, combined with the 30-degree angle, covers most medium to large artworks evenly. If your ceilings are higher, increase the distance proportionally. On a 10-foot ceiling, 3 to 4 feet from the wall works well.
For picture lights mounted directly above a frame, the fixture arm should extend far enough from the wall that the light reaches the bottom of the painting, not just the top third. A common mistake is choosing a picture light with a short arm that only illuminates the upper portion, leaving the lower half in shadow. WAC Lighting's guide to picture light placement offers helpful visual diagrams showing how arm length affects coverage.
Brightness: Less Is More
One of the most common mistakes homeowners make is flooding artwork with too much light. Brighter is not better. Museum conservators recommend keeping light levels between 50 and 200 lux depending on the medium, according to the Smithsonian's National Museum of Asian Art. For a home setting, this translates to a soft, noticeable glow that draws your eye to the piece without making you squint or washing out the colors.
Start with your art light on its lowest setting and gradually increase until the artwork looks vivid and present but not blasted. If people walk into the room and notice the light fixture before they notice the art, it is too bright.
Room-by-Room Guide: Where and How to Light Art
Every room in your home has different ambient light conditions, foot traffic patterns, and viewing distances. Here is how to approach art lighting in each.
Living Room
This is typically where your most important pieces hang, and where you spend the most time looking at them. The living room usually has mixed lighting: windows providing daylight, overhead fixtures, table lamps, and possibly a fireplace. Your goal is to add a dedicated layer of art lighting that works with these existing sources.
Best approach: A Situ Lighting Rechargeable Picture Light mounted above your primary statement piece is the simplest way to achieve a gallery look without any wiring. Its 3000K warm LED and 93+ CRI create accurate, flattering color rendering for oils, acrylics, and photographs. For a gallery wall with multiple pieces, consider a track lighting system. The Gpaillumic LED Track Light offers adjustable beam angles from 12 to 60 degrees, so you can spotlight a small piece and flood a large canvas from the same track.
Tip: In the evening, dim your ambient room lighting and let the art lights take center stage. This creates genuine gallery drama without spending a dollar on renovation.
Hallway
Hallways are actually ideal art spaces because you control the lighting completely. There are rarely competing windows, and the narrow sightline means you view each piece head-on, exactly as it was composed.
Best approach: Wireless battery-operated picture lights are perfect here because running electrical wiring through finished hallway walls is expensive and disruptive. Space them evenly above each piece for a curated, intentional look. The consistent warm glow down a hallway creates a visual rhythm that makes even a modest collection feel considered.
Tip: Choose lights with a timer function so they turn on automatically at dusk and off at bedtime. You want the hallway to feel like a gallery every evening without having to remember to flip switches.
Bedroom
Bedroom art lighting should feel calm and warm. Avoid anything too bright or cool-toned, which works against the restful atmosphere you want in a sleeping space.
Austin Art Insider
Free weekly guide to galleries, exhibitions & collecting in Austin.
Best approach: A single picture light on a warm 2700K setting, dimmed to about 40% brightness, creates a soft accent that adds ambiance without disrupting sleep. Position it so the light does not spill onto your pillow area. For artwork above a headboard, a picture light with a downward-focused beam keeps the glow on the canvas and out of your eyes.
Tip: If you read in bed, make sure your art light and your reading light are on separate controls. You want to enjoy the painting's glow while reading without the reading lamp washing it out.
Stairway
Stairway walls are dramatic but tricky. The viewing angle changes constantly as you ascend or descend, and the vertical arrangement of art along the stairline creates unique lighting challenges.
Best approach: Recessed adjustable spotlights in the ceiling above the stairway are the cleanest solution if you are building or renovating. For existing homes, wireless picture lights above each piece work well. Position each light to aim at its respective painting from the same relative angle, which creates visual consistency even though the pieces are at different heights.
Tip: Because stairway art is typically viewed in passing rather than from a standing position, slightly brighter lighting helps. You want the art to register and make an impression in the two to three seconds someone is walking by.
Not all artwork responds to light the same way. The medium, the surface finish, and whether a piece is behind glass all affect how you should light it.
Oil Paintings
Oil paintings are the most forgiving medium to light. Their varnished surfaces have a natural luminosity that comes alive under warm directional light. Use a color temperature of 2700K to 3000K to bring out the warmth of earth tones, skin tones, and rich darks that oil painters work so hard to achieve. The 30-degree angle works perfectly here, and if the painting has heavy texture, go steeper to catch those brushstrokes.
Watercolors and Works on Paper
Watercolors, pastels, and prints on paper are the most light-sensitive artworks in a typical home collection. The Museums Galleries Scotland conservation guidelines recommend keeping light levels at 50 lux or below for works on paper, which is significantly dimmer than what you might use for an oil painting. Keep these pieces on interior walls away from windows, use the lowest effective brightness setting on your art light, and consider adding UV-filtering glass to the frame for an extra layer of protection.
Photographs
Photographs need neutral, accurate light. A color temperature of 3000K to 3500K works well for most photographic prints, providing enough warmth to feel inviting without shifting the color balance the photographer intended. Black-and-white photographs are particularly sensitive to color temperature: too warm and the whites look yellow, too cool and the blacks look blue. Aim for 3000K and adjust from there.
Photographs are almost always behind glass, which means glare management is critical. Use the 30-to-35-degree angle rule, and if glare persists, consider upgrading to anti-reflective museum glass for your most important prints.
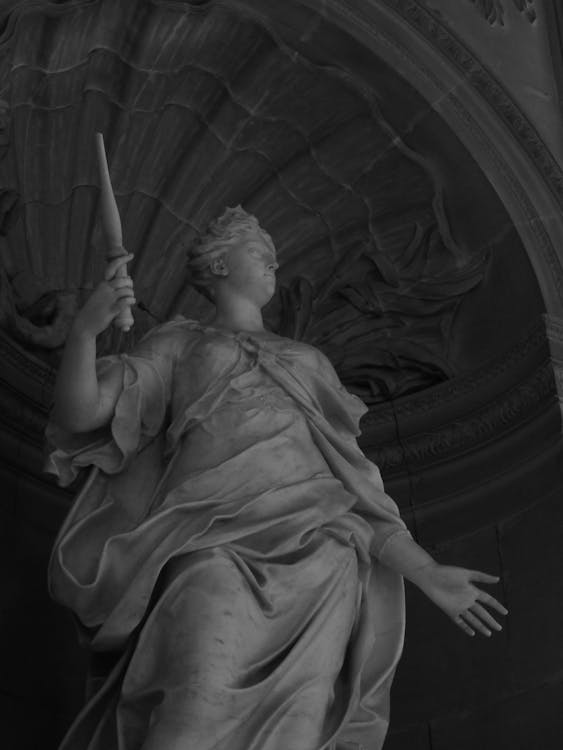
Sculpture and Three-Dimensional Work
Sculpture is a different challenge entirely. Flat, even light robs three-dimensional work of its drama. You want directional light from at least two angles to create the interplay of light and shadow that makes sculpture come alive. A single spotlight from above and slightly to one side, combined with softer ambient light from the other side, creates depth and dimension. Uplights placed on the floor or a shelf below the sculpture can create particularly dramatic effects for pieces displayed on pedestals.
Simple DIY Solutions vs. Professional Installation
How far you take your art lighting depends on your budget, your comfort with basic tools, and whether you own or rent your home.
DIY-Friendly Options (No Electrician Needed)
The easiest path to great art lighting requires zero tools and zero holes in the wall. Rechargeable wireless picture lights like the Situ Lighting Rechargeable Micro Series stick to the wall or frame with adhesive strips and charge via USB. You can be up and running in five minutes. Battery-operated puck lights and remote-controlled wireless options offer similar convenience at lower price points.
Plug-in track lighting kits are a step up. These mount to the ceiling with screws and plug into a nearby outlet, giving you adjustable, directable light without touching any electrical wiring. They are not as clean-looking as hardwired systems, but with a cord channel painted to match your wall color, they are barely noticeable.
Clip-on spotlights clamped to a nearby shelf or bookcase can work surprisingly well as accent lights for a single piece, particularly in a study or reading nook.
When to Go Professional
If you want hardwired picture lights, recessed adjustable ceiling spotlights, or a permanent track lighting system, you are likely looking at professional installation. This involves running new electrical wiring inside your walls or ceiling, which in most jurisdictions requires a licensed electrician and may need a permit.
Call an electrician when:
You want hardwired fixtures with no visible cords
You are installing recessed ceiling lights that require cutting into drywall and running new circuits
Your home's electrical panel is older and you are unsure about capacity
You want multiple art lights on a single dedicated dimmer circuit
You are renovating and can run wiring before the walls are closed up (this is the cheapest time to add art lighting)
A licensed electrician typically charges $150 to $500 per fixture for a complete hardwired installation, depending on your location and the complexity of the run. If you are already renovating a room, adding art lighting wiring costs a fraction of that since the walls are already open.
Common Mistakes (and How to Avoid Them)
After years of helping collectors display their artwork, we see the same lighting mistakes again and again. Here are the ones to watch for.
Too Bright
The most common error. People install a light, crank it to maximum, and wonder why the art looks washed out and the wall above it is blinding. Art lighting should enhance, not overpower. If the light source itself draws more attention than the artwork, dial it back. A subtle glow that you almost do not consciously notice but that makes the colors sing is the goal.
Wrong Color Temperature
Using a "daylight" bulb (5000K-6500K) on a warm oil painting is like putting fluorescent office lighting in your dining room. It strips the warmth right out of the piece. Conversely, a very warm 2200K bulb on a cool-toned contemporary photograph will make it look muddy. For most home art lighting, 2700K to 3000K is the safe zone. When in doubt, 3000K is the most versatile starting point.
Glare on Glass
If you can see the reflection of your light fixture in the glass covering your artwork, the angle is wrong. Adjust the fixture position until the reflection falls below your normal viewing height. The 30-degree rule handles this in most cases, but every room is different. Stand where you normally view the piece and adjust until the glare disappears.
Uneven Coverage
A light that illuminates only the top half of a painting, or one that creates a bright spot in the center and dark edges, looks worse than no dedicated light at all. This usually means the fixture is too close to the wall or the beam angle is too narrow. Step back, observe the coverage, and adjust the distance or swap for a wider beam. For comprehensive tips on choosing the right beam angle and fixture type, read our gallery wall tools and tips guide.
Lighting from Below
Insider Tip
Museums use 5-15 foot-candles for works on paper and 15-25 for oil paintings. A simple light meter app on your phone can help you match these levels.
Unless you are deliberately going for a dramatic, theatrical effect on a sculpture, avoid uplighting paintings and photographs. Light from below creates unnatural shadows and makes flat artwork look strange. Our eyes expect light to come from above, the way the sun and most interior fixtures work, so overhead or angled-from-above lighting always looks more natural on wall-hung art.
Ignoring the Rest of the Room
Art lighting does not exist in a vacuum. If your room has a bright, cool-toned overhead light and you install warm picture lights, the contrast will look jarring. Aim for consistency. Match the color temperature of your art lights to the dominant ambient lighting in the room, or better yet, use the art lights as an opportunity to set the entire room's evening mood by dimming the overhead lights and letting the artwork glow.
Modern smart home technology makes it remarkably easy to automate and fine-tune your art lighting without thinking about it day-to-day.
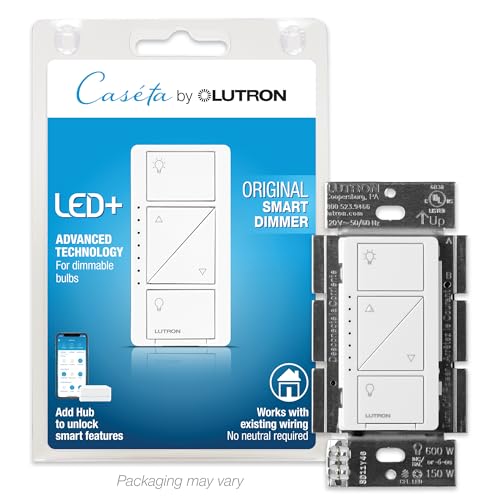
Dimmer Switches: The Single Best Upgrade
If you do one thing after reading this guide, put your art lights on a dimmer. A Lutron Caseta Smart Dimmer Switch lets you control brightness from your phone, set schedules, and create scenes. Imagine your picture lights fading on at 15% brightness when the sun starts setting, then ramping up to 40% after dinner when you are relaxing in the living room, then fading off at midnight. All automatic, every day. The Caseta system works with Alexa, Apple Home, and Google Home, so you can adjust with your voice or fold it into your existing smart home routines.
For plug-in picture lights that do not connect to a wall switch, a smart plug with dimming capability achieves the same effect. Plug your picture light into the smart plug, and schedule it to turn on and off with your daily routine.
Scheduled Lighting for Art Preservation
Smart scheduling is not just convenient, it is good for your art. Remember that light damage is cumulative. By automating your art lights to run only during the hours you are actually in the room enjoying them, you cut the total light exposure dramatically compared to leaving them on all day. Set your lights to turn off when you leave for work and turn on when you get home. Your artwork will last longer, and your electricity bill will thank you.
Scene Control
Most smart lighting systems let you create "scenes," preset combinations of brightness levels across multiple fixtures. Create an "Art Gallery" scene that dims your overhead lights to 20%, brings your picture lights to 40%, and turns off any lamps that create competing glare. One tap on your phone, and your living room transforms into a private gallery. Create a "Movie Night" scene that turns everything off except a single accent light on your favorite painting, providing just enough ambient glow without screen glare.
Create an "Art Gallery" scene that dims your overhead lights to 20%, brings your picture lights to 40%, and turns off any lamps that create competing glare.
Bringing It All Together
Good art lighting is not about spending a fortune or mastering technical specifications. It is about being intentional. Choose the right wall for natural light. Position your fixtures at the right angle. Match your color temperature to the medium. Use dimmers so you can adjust for the time of day and the mood of the room. And protect your collection by managing total light exposure over time.
Start with your single most important piece. Get the light right on that one painting or photograph, and you will immediately understand the difference it makes. Then work outward from there, one piece at a time, until your entire home feels like the curated, considered space your collection deserves.
If you have inherited artwork, an estate collection, or pieces you have been meaning to display properly, Austin Gallery can help. We consign art of all types with zero upfront fees and provide guidance on everything from framing to display. And we know from experience that nothing transforms a room quite like art that is beautifully lit.
Share
Austin Art Insider
Free weekly guide to galleries, exhibitions & collecting in Austin.
Consignment
Have Art You Want to Sell?
Free appraisals, zero upfront fees, nationwide service from Austin, Texas.