Create a Gallery Wall That Actually Works: Tools and Tips (Complete Guide)
How to create a gallery wall that works. Essential tools and design tips for beautiful arrangements.
By Austin Gallery
Whether you have inherited a collection of framed artwork, picked up pieces over the years at estate sales, or invested in original paintings from a gallery, getting them on the wall in a way that looks intentional and polished is a different skill entirely. A gallery wall done well transforms a room. Done poorly, it leaves you with crooked frames, patched drywall, and that nagging feeling that something is off. This guide walks you through the entire process, from planning your layout on the floor to driving the final nail, with specific product recommendations, spacing standards used by professional installers, and the techniques we use when hanging art at Austin Gallery.
The single biggest mistake people make is skipping the planning stage. They grab a nail, eyeball a spot, and hammer away. Twenty minutes later they have three extra holes in the wall and a frame that drifts left every time someone walks past. Planning costs you nothing but time, and it saves you from every downstream headache.
This is the technique used by professional gallery installers, and it works every time:
Lay each frame face-down on kraft paper or newspaper. Trace the outline and cut it out.
Mark the exact spot on each paper template where the hanging wire or bracket sits when the frame is held against the wall. This is your nail point.
Arrange the paper cutouts on your wall using painter's tape (low-tack so it will not damage paint). Step back, adjust, live with it for a day.
When you are satisfied, drive your nail or hook through the marked point on each template. Tear the paper away and hang the frame.
This method eliminates guesswork. You see the exact footprint of every piece on the wall before you commit to hardware. For frames heavier than 20 pounds, mark two hanging points so you can install French cleats or double-hook systems with precision.
For frames heavier than 20 pounds, mark two hanging points so you can install French cleats or double-hook systems with precision.
The App Method
If paper templates feel tedious, several apps let you photograph your wall and virtually place frames on it. The iArtView app is popular among collectors and lets you preview artwork at scale on your actual walls using your phone's camera. Canva also works for creating scaled layouts if you know your wall and frame dimensions. These are useful for getting a general sense of proportion, but they lack the tactile precision of the paper template method. We recommend using an app for initial brainstorming and paper templates for final placement.
Spacing Rules That Professionals Follow
Museums and galleries adhere to specific spacing standards that have been refined over decades. You do not need to follow them rigidly in a home setting, but they provide an excellent baseline.
The 57-Inch Rule
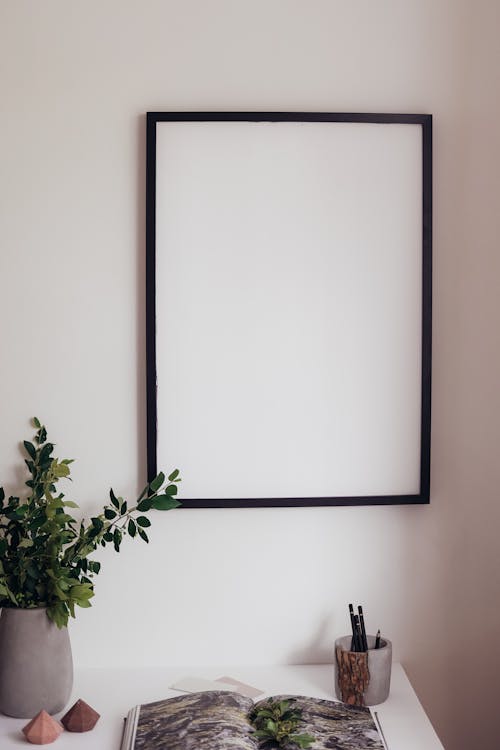
The standard center-hang height used by most major museums, including the Museum of Modern Art and the Smithsonian, is 57 inches from the floor to the center of the artwork. This places the visual center at average eye level and creates consistency across a collection. For a single statement piece, 57 inches is nearly always the right call. For gallery walls with multiple pieces, the center of the overall grouping should sit at approximately 57 inches.
If your ceilings are unusually tall (10 feet or more) or your furniture is low-slung and modern, you can shift up to 60 inches. The key is consistency across the room. Pick a center height and commit to it.
Spacing Between Frames
The standard gap between framed works in a professional gallery setting is 2 to 3 inches. This applies to both horizontal and vertical spacing. Here is how to calibrate:
Small frames (under 16 inches): 1.5 to 2 inches between frames
Medium frames (16 to 30 inches): 2 to 3 inches between frames
Large frames (over 30 inches): 3 to 4 inches between frames
Mixed sizes: Use 2.5 inches as your constant and adjust only when a gap looks optically uneven
Consistency matters more than the exact number. If you choose 2.5 inches, use 2.5 inches everywhere. A Bosch GLL 30 Self-Leveling Cross-Line Laser Level projects perfectly horizontal and vertical reference lines on your wall, which makes maintaining even spacing across a large arrangement significantly easier than working with a bubble level and pencil marks.
Not every grouping of art needs to follow the same structure. The arrangement you choose should reflect the character of your collection and the architecture of the room.
Grid Arrangement
Frames of identical size hung in a precise grid. This works best with a series (photographs from the same shoot, a set of prints, botanical illustrations) and in spaces with clean architectural lines. Grid arrangements demand precision. Every frame must be exactly the same size, and every gap must be identical. Use the laser level referenced above and measure twice.
Salon Style
The classic European gallery hang: frames of different sizes, orientations, and styles clustered together with uniform spacing. This is the most forgiving arrangement because the variety itself creates visual interest, and small imperfections disappear in the overall composition. Salon-style walls are ideal for inherited collections and estate art, where pieces were never intended to match. Draw an invisible boundary (a rectangle or oval shape) and fill it, keeping your spacing consistent. The outer edges of the grouping should form a roughly clean perimeter even if the interior arrangement is varied.
Linear (Horizontal or Vertical)
A single row of frames arranged along a horizontal or vertical axis. Horizontal lines work above sofas, console tables, and headboards. Vertical arrangements suit narrow walls, hallways, and the space flanking a doorway. Align frames either by their top edges, bottom edges, or center lines. Top-edge alignment tends to look most intentional.
Staircase Arrangement
Frames arranged to follow the angle of a staircase. The key is to keep each frame's center point equidistant from the stair nosing below it. Most professionals use a consistent 8- to 10-inch distance from the stair line to the bottom edge of each frame. The International Association of Home Staging Professionals recommends treating staircase walls as an opportunity to create a visual narrative that ascends with the viewer.
The hardware that holds your art is only as good as the wall it is attached to. Using the wrong fastener for your wall type is one of the fastest ways to end up with a shattered frame on the floor.
Drywall (Standard Residential Construction)
Most modern homes in the Austin area have half-inch drywall over wood studs spaced 16 inches on center. For any frame under 15 pounds, a standard picture hook and nail driven at a downward angle into the drywall alone is sufficient. OOK Professional Picture Hangers are the industry standard and come rated for specific weight ranges. Use the rated capacity printed on the package, not your own optimism.
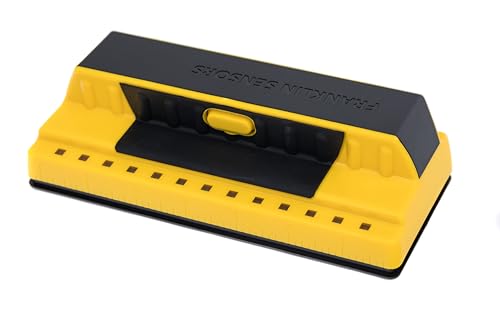
For frames between 15 and 50 pounds, anchor into a wall stud whenever possible. Use a Zircon StudSensor e50 Electronic Stud Finder to locate the center of the stud before drilling. If no stud is available at your desired hanging point, use TOGGLER SnapToggle Anchors, which grip behind the drywall and hold significantly more weight than plastic expansion anchors. They are rated for 80 pounds in half-inch drywall, which gives you ample margin.
Austin Art Insider
Free weekly guide to galleries, exhibitions & collecting in Austin.
For artwork over 50 pounds, always use a French cleat system. A Heavy Duty French Cleat Hanger Kit distributes weight across a wide section of wall and lets you make fine horizontal adjustments after installation. Anchor the wall-side cleat into at least two studs for maximum security.
Plaster over wood lath is common in Austin's older neighborhoods, particularly in homes built before 1960. Plaster is harder than drywall but also more brittle. Standard picture hooks work for lightweight pieces, but you must drill a pilot hole first to prevent cracking. Use a masonry bit at low speed. Avoid toggle bolts in plaster; the lath behind the plaster often does not provide enough clearance for the toggle to open. Instead, use wood screws long enough to reach the lath and bite into it. For heavy pieces on plaster, a French cleat screwed through the plaster and into the lath and studs behind it is the most reliable method.
Brick and Masonry
Exposed brick accent walls are popular in Austin lofts and renovated commercial spaces. You have two options: drill into the mortar joints using masonry anchors, or use brick clips that grip the face of the brick without drilling. For anything over 10 pounds, drilling into mortar with a masonry bit and inserting a lead or plastic masonry anchor is the right approach. Never drill into the face of the brick itself; mortar is softer, easier to repair, and provides reliable holding power. The Architectural Digest guide to hanging art on brick provides a good visual walkthrough.
This is the area where people most often underestimate the challenge. A framed 24x36-inch print behind glass can weigh 15 to 20 pounds. A large oil painting in a gilded frame can exceed 50 pounds. An antique mirror with a carved wood frame can top 80 pounds. Weigh your art before choosing hardware. A bathroom scale works: weigh yourself, then weigh yourself holding the piece, and subtract.
Adhesive strips (for lightweight or rental situations):Command Picture Hanging Strips hold up to 16 pounds per set and leave no damage when removed properly. These are the best option for renters or for walls where you do not want any holes.
Rubber bumpers:Clear rubber bumpers stick to the bottom corners of each frame to prevent the frame from sliding, scuffing the wall, or tilting forward over time. This is the finishing detail most people skip.
Painter's tape: For the paper template method and for protecting walls during layout.
Step-by-Step Hanging Process
With your layout planned and your tools assembled, follow this sequence:
Step 1: Mark your center height. Measure 57 inches from the floor and make a light pencil mark. If you are hanging above furniture, ensure at least 6 to 8 inches of clearance between the top of the furniture and the bottom edge of the lowest frame.
Step 2: Locate studs. Run the stud finder across your planned hanging area and mark stud locations with small pieces of painter's tape. Knowing where studs are allows you to adjust hanging points by an inch or two to catch solid wood when possible.
Step 3: Transfer measurements from your paper templates. If you used the paper template method, your nail points are already marked. If not, measure the distance from the top of the frame to the hanging wire or bracket when the wire is pulled taut (simulating the frame's weight). Subtract that distance from the top edge of where you want the frame to sit. That gives you your nail or hook height.
Step 4: Install hardware. Drive picture hooks at a downward angle (the hook's nail should enter the wall at roughly 45 degrees, which is how they are designed to bear weight). For toggle anchors, drill your pilot hole, insert the anchor, and tighten the bolt. For French cleats, level the wall-side cleat with your laser, mark your screw holes at stud locations, and drive the screws.
Step 5: Hang and level. Place each frame on its hardware. Use a small bubble level (or your phone's level app) on the top edge of the frame to verify it is straight. Make micro-adjustments by shifting the wire left or right on the hook.
Step 6: Apply bumpers. Press clear rubber bumpers onto the two bottom corners of the frame's back. These prevent the frame from tilting forward and protect your wall surface. This small step makes a noticeable difference in how clean the installation looks over time.
Step 7: Step back and evaluate. View the wall from the primary vantage point in the room, typically the doorway or the seating area. Check spacing, level, and overall balance. Adjust as needed before patching any unused holes.
Even experienced homeowners fall into these traps. Knowing them in advance saves you time and wall repairs.
Hanging too high. This is the most common error. When in doubt, go lower. The 57-inch center rule exists because people instinctively hang art too high. Stand at the normal viewing distance from the wall (6 to 10 feet) and check that the art is at a comfortable viewing height, not above your sightline.
Using the wrong hardware for the weight. A single nail in drywall is not rated for a 25-pound frame, regardless of what worked at your last apartment. Check the weight, check the wall type, choose the appropriate hardware.
Ignoring the hanging wire's sag. When you measure from the top of the frame to the wire, pull the wire taut to the point where it would sit on a hook. If you measure the wire slack, your frame will hang inches lower than planned.
Inconsistent spacing. If some gaps are 2 inches and others are 3.5 inches, the entire arrangement looks unplanned. Use a spacer (a scrap of cardboard cut to your chosen width) and physically hold it between frames as you mark each position.
Not accounting for frame depth. Deep frames (shadowboxes, floater frames, thick gallery-wrap canvases) project further from the wall and cast larger shadows. Place deeper frames at the edges of a grouping rather than the center to avoid an uneven profile.
Skipping the bumpers. Without bumpers, frames tilt forward at the top and create uneven shadows. They also slide and scuff paint. Applying rubber bumpers to every frame takes five minutes and keeps your wall looking professionally installed for years.
Hanging on freshly painted walls. Allow latex paint to cure for at least two to four weeks before installing hardware. Adhesive strips in particular can pull off uncured paint when removed. The paint surface needs time to fully harden and bond to the wall before bearing weight or adhesive tension. Benjamin Moore's guide to paint curing times is a reliable reference.
When to Call a Professional
If you have artwork valued over $5,000, pieces that weigh more than 75 pounds, or walls made of materials like concrete, stone veneer, or metal stud construction, consider hiring a professional art installer. The cost is typically $150 to $400 per session, depending on the number of pieces and the complexity of the wall. That is a small price compared to the replacement cost of a damaged original painting or a drywall repair from a failed anchor.
The cost is typically $150 to $400 per session, depending on the number of pieces and the complexity of the wall.
At Austin Gallery, we offer installation guidance for pieces purchased or consigned through our gallery. If you are working with an estate collection and need help determining how to display, preserve, or consign inherited artwork, contact us to discuss your options.
The Hanging Toolkit
The specific products we keep coming back to. Each link is affiliate — clicking through and buying supports the work we do here at no cost to you.