Reference · Updated August 2026
Kiln cone temperature chart
Every Orton pyrometric cone from 022 to 14, in Fahrenheit and Celsius, at all three published heating rates. Because a cone measures heat work rather than temperature, the rate you fire at changes the answer, and that column is the one most charts leave out.
By the Austin Gallery editors · Updated August 2026
Cone 6 is 2232°F (1222°C), cone 04 is 1945°F (1063°C), and cone 10 is 2345°F (1285°C) using Orton self-supporting cones heated at 108°F (60°C) per hour. Fire the same cone 6 more slowly, at 27°F per hour, and it bends at 2165°F. Fire it fast, at 270°F per hour, and it holds out to 2269°F. That 104°F spread within a single cone number is not measurement noise. It is the entire point of a cone: a cone measures heat work, the combined effect of time and temperature, so a slower firing reaches the same result at a lower peak. Every number below comes from the Edward Orton Jr. Ceramic Foundation, which manufactures the cones and publishes the equivalents.
The full Orton cone chart (self-supporting cones)
This is the table to bookmark. These are Orton's regular self-supporting cones, the series most studio potters buy, shown at all three heating rates in both scales. The heating rate is measured over the last 180°F (100°C) of the firing, not the whole cycle. Blank cells are blank on Orton's own chart, which publishes no slow-rate value for cones 022 through 020.
| Cone | Fahrenheit at heating rate | Celsius at heating rate | ||||
|---|---|---|---|---|---|---|
| 27°F/hr (slow) | 108°F/hr (medium) | 270°F/hr (fast) | 15°C/hr (slow) | 60°C/hr (medium) | 150°C/hr (fast) | |
| 022 | - | 1087 | 1094 | - | 586 | 590 |
| 021 | - | 1112 | 1143 | - | 600 | 617 |
| 020 | - | 1159 | 1180 | - | 626 | 638 |
| 019 | 1213 | 1252 | 1283 | 656 | 678 | 695 |
| 018 | 1267 | 1319 | 1353 | 686 | 715 | 734 |
| 017 | 1301 | 1360 | 1405 | 705 | 738 | 763 |
| 016 | 1368 | 1422 | 1465 | 742 | 772 | 796 |
| 015 | 1382 | 1456 | 1504 | 750 | 791 | 818 |
| 014 | 1395 | 1485 | 1540 | 757 | 807 | 838 |
| 013 | 1485 | 1539 | 1582 | 807 | 837 | 861 |
| 012 | 1549 | 1582 | 1620 | 843 | 861 | 882 |
| 011 | 1575 | 1607 | 1641 | 857 | 875 | 894 |
| 010 | 1636 | 1657 | 1679 | 891 | 903 | 915 |
| 09 | 1665 | 1688 | 1706 | 907 | 920 | 930 |
| 08 | 1692 | 1728 | 1753 | 922 | 942 | 956 |
| 07 | 1764 | 1789 | 1809 | 962 | 976 | 987 |
| 06 | 1798 | 1828 | 1855 | 981 | 998 | 1013 |
| 05½ | 1839 | 1859 | 1877 | 1004 | 1015 | 1025 |
| 05 | 1870 | 1888 | 1911 | 1021 | 1031 | 1044 |
| 04 | 1915 | 1945 | 1971 | 1046 | 1063 | 1077 |
| 03 | 1960 | 1987 | 2019 | 1071 | 1086 | 1104 |
| 02 | 1972 | 2016 | 2052 | 1078 | 1102 | 1122 |
| 01 | 1999 | 2046 | 2080 | 1093 | 1119 | 1138 |
| 1 | 2028 | 2079 | 2109 | 1109 | 1137 | 1154 |
| 2 | 2034 | 2088 | 2127 | 1112 | 1142 | 1164 |
| 3 | 2039 | 2106 | 2138 | 1115 | 1152 | 1170 |
| 4 | 2086 | 2124 | 2161 | 1141 | 1162 | 1183 |
| 5 | 2118 | 2167 | 2205 | 1159 | 1186 | 1207 |
| 5½ | 2133 | 2197 | 2237 | 1167 | 1203 | 1225 |
| 6 | 2165 | 2232 | 2269 | 1185 | 1222 | 1243 |
| 7 | 2194 | 2262 | 2295 | 1201 | 1239 | 1257 |
| 8 | 2212 | 2280 | 2320 | 1211 | 1249 | 1271 |
| 9 | 2235 | 2300 | 2336 | 1224 | 1260 | 1280 |
| 10 | 2284 | 2345 | 2381 | 1251 | 1285 | 1305 |
| 11 | 2322 | 2361 | 2399 | 1272 | 1294 | 1315 |
| 12 | 2345 | 2383 | 2419 | 1285 | 1306 | 1326 |
| 13 | 2389 | 2428 | 2458 | 1310 | 1331 | 1348 |
| 14 | 2464 | 2489 | 2523 | 1351 | 1365 | 1384 |
Orton self-supporting regular (SSB) cones, cone numbers 022 to 14. Source: The Edward Orton Jr. Ceramic Foundation, “Using Orton Pyrometric Cones, Cone Numbers 022-14” (©2016 Orton Ceramic Foundation). Heating rate is the rate during the last 180°F / 100°C of firing. Values are for a mounted height of 1¾ inches above the base, which self-supporting cones have built in. Orton publishes a separate iron-free (SSK) series for reduction firings between cones 010 and 3, with slightly different values.
Read this before you use the numbers
Orton prints this caution on the chart itself, and it is the honest frame for any cone chart including this one: the tables are a guide for selecting cones, and the actual bending temperature depends on firing conditions. Your kiln, your load, your schedule, and your thermocouple all move the result. Use the chart to pick a cone; use a witness cone in your own kiln to find out what actually happened.
Why one cone has three temperatures
A pyrometric cone is a carefully formulated ceramic that softens and bends when it has absorbed a specific amount of heat. Orton describes the mechanism as pyroplastic deformation: glass forms inside the cone, gravity pulls the tip over, and the final bending position indicates how much heat was absorbed.
Absorbing heat takes time. A kiln climbing slowly gives the cone longer at every temperature on the way up, so the cone accumulates enough heat work and bends sooner in temperature terms. A kiln racing to the top gives it less time, so the cone needs a higher peak to reach the same state. Orton puts it directly: the temperature required to cause a cone to bend is higher for faster heating rates and lower for slower rates.
The practical consequence is that “cone 6” is not a temperature at all, it is a target condition. Two potters can both fire honest cone 6, one peaking at 2165°F and one at 2269°F, and both are right. It also explains a frustration every new potter hits: a glaze that runs in one kiln and stays dry in another at the identical set point. The set points matched; the heat work did not.
Cones vs a pyrometer: heat work vs temperature
A thermocouple and pyrometer answer “how hot is it right now.” A cone answers “did the work get what it needed.” Those are different questions, and clay and glaze only care about the second one. Orton is explicit that cones do not measure temperature alone but measure heat work, the combined effect of time and temperature, and that electronic controllers cannot measure heat work.
This is not an argument against pyrometers. You need one, or a controller that has one, to run a schedule at all: to ramp at a known rate, to hold, to control cooling. The point is that a thermocouple ages and drifts, it reads one spot in a chamber that is never perfectly even top to bottom, and nothing on the display tells you it has gone soft by half a cone. A digital pyrometer runs the firing; a cone on the shelf next to the pots grades it. Serious studios use both, every load, and that is also how we approached the controller question in our guide to the best kilns for pottery and glass.
What we would keep on the shelf
The cones and hardware that make the chart above usable. Affiliate links, so we may earn a commission at no cost to you.
 Orton Self-Supporting Cone 04 (Pkg/25)The bisque witness cone. Self-supporting means the 1¾ in height and 8 degree angle are built in, so the chart values apply as printed.View on Amazon →
 Orton Self-Supporting Cone 05 (25 Pack)The low-fire glaze cone, and the one AMACO and most commercial raku glazes are formulated to.View on Amazon →
 Orton Self-Supporting Cone 6 (Pkg/25)The mid-range workhorse. If you fire one cone in an electric studio kiln, it is this one.View on Amazon →
 Orton BRB Pyrometric Bar Cones, 06Bar cones are the Kiln-Sitter shutoff format. They are not witness cones: keep a self-supporting cone on the shelf too.View on Amazon →
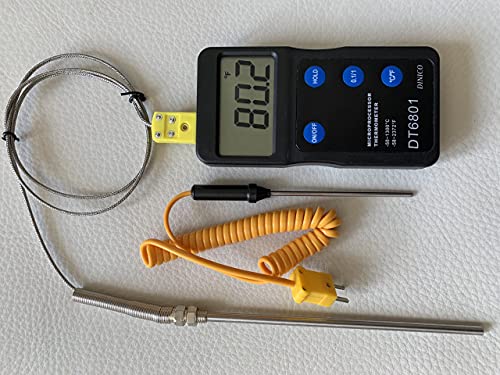 Thermomart Digital Kiln Pyrometer (°F / °C)A pyrometer reads temperature, which is the number cones do not give you. Use both: the pyrometer runs the schedule, the cone grades the result.View on Amazon →
 AMACO Assorted Pointed Stilts, 30-Count KitGlazed ware fired to a vitrified cone will fuse to the shelf. Stilts and a clean shelf are the other half of a successful firing.View on Amazon →
Self-supporting, large, and small cones
Orton sells the same cone formulations in different physical formats, and the format changes the numbers, because a cone bends according to how much of it stands above the base and at what angle.
- Self-supporting cones have a built-in base and stand on any flat surface. Orton states they are the correct height, 1¾ inches exposed above the base, with the 8 degree bending angle built in, and that glaze and kiln manufacturers recommend them. They are the ones to buy: they design mounting error out.
- Large cones are read at 2 inches of exposed height in a plaque set at 8 degrees. Orton notes that if you mount large cones at 1¾ inches instead, you should read them against the self-supporting temperatures.
- Small cones (also called junior or bar cones) are the Kiln-Sitter format, exposed 15/16 inch in a holder. Orton publishes only one column for them, determined at 540°F (300°C) per hour in a gas fired kiln, which is why small-cone numbers look so much higher than self-supporting numbers for the same cone.
One honest caveat on small cones. Orton's printed chart says small cones typically deform 7 to 10°C earlier than a self-supporting cone, so you can subtract 7 to 10°C (12 to 18°F) from a self-supporting value to estimate the small-cone equivalent. Orton's small cones product page says the opposite direction: that small cones used on the kiln shelf deform at about 9°F after large or self-supporting cones of the same number. We are not going to average two of Orton's own statements into a made-up third. Either way the offset is under 20°F, and the practical rule holds: use bar cones to shut the Kiln-Sitter off, and put a self-supporting witness cone on the shelf to find out what really happened.
Small cone temperatures (Kiln-Sitter cones)
| Cone | °F at 540°F/hr | °C at 300°C/hr |
|---|---|---|
| 022 | 1166 | 630 |
| 021 | 1189 | 643 |
| 020 | 1231 | 666 |
| 019 | 1333 | 723 |
| 018 | 1386 | 752 |
| 017 | 1443 | 784 |
| 016 | 1517 | 825 |
| 015 | 1549 | 843 |
| 014 | 1598 | 870 |
| 013 | 1616 | 880 |
| 012 | 1652 | 900 |
| 011 | 1679 | 915 |
| 010 | 1686 | 919 |
| 09 | 1751 | 955 |
| 08 | 1801 | 983 |
| 07 | 1846 | 1008 |
| 06 | 1873 | 1023 |
| 05½ | 1909 | 1043 |
| 05 | 1944 | 1062 |
| 04 | 2008 | 1098 |
| 03 | 2068 | 1131 |
| 02 | 2098 | 1148 |
| 01 | 2152 | 1178 |
| 1 | 2163 | 1184 |
| 2 | 2174 | 1190 |
| 3 | 2185 | 1196 |
| 4 | 2208 | 1209 |
| 5 | 2230 | 1221 |
| 6 | 2291 | 1255 |
| 7 | 2307 | 1264 |
| 8 | 2372 | 1300 |
| 9 | 2403 | 1317 |
| 10 | 2426 | 1330 |
| 11 | 2437 | 1336 |
| 12 | 2471 | 1355 |
Orton small regular cones, for a mounted height of 15/16 inch. Orton determined these values at a heating rate of 300°C/hr (540°F/hr) in a gas fired kiln, and publishes no slow or medium column for this format. Source: Orton Ceramic Foundation.
Large cone temperatures
| Cone | °F at 108°F/hr | °F at 270°F/hr | °C at 60°C/hr | °C at 150°C/hr |
|---|---|---|---|---|
| 019 | 1249 | 1279 | 676 | 693 |
| 018 | 1314 | 1350 | 712 | 732 |
| 017 | 1357 | 1402 | 736 | 761 |
| 016 | 1416 | 1461 | 769 | 794 |
| 015 | 1450 | 1501 | 788 | 816 |
| 014 | 1485 | 1537 | 807 | 836 |
| 013 | 1539 | 1578 | 837 | 859 |
| 012 | 1576 | 1616 | 858 | 880 |
| 011 | 1603 | 1638 | 873 | 892 |
| 010 | 1648 | 1675 | 898 | 913 |
| 09 | 1683 | 1702 | 917 | 928 |
| 08 | 1728 | 1749 | 942 | 954 |
| 07 | 1783 | 1805 | 973 | 985 |
| 06 | 1823 | 1852 | 995 | 1011 |
| 05½ | 1854 | 1873 | 1012 | 1023 |
| 05 | 1886 | 1915 | 1030 | 1046 |
| 04 | 1940 | 1958 | 1060 | 1070 |
| 03 | 1987 | 2014 | 1086 | 1101 |
| 02 | 2014 | 2048 | 1101 | 1120 |
| 01 | 2043 | 2079 | 1117 | 1137 |
| 1 | 2077 | 2109 | 1136 | 1154 |
| 2 | 2088 | 2124 | 1142 | 1162 |
| 3 | 2106 | 2134 | 1152 | 1168 |
| 4 | 2120 | 2158 | 1160 | 1181 |
| 5 | 2163 | 2201 | 1184 | 1205 |
| 6 | 2228 | 2266 | 1220 | 1241 |
| 7 | 2259 | 2291 | 1237 | 1255 |
| 8 | 2277 | 2316 | 1247 | 1269 |
| 9 | 2295 | 2332 | 1257 | 1278 |
| 10 | 2340 | 2377 | 1282 | 1303 |
| 11 | 2359 | 2394 | 1293 | 1312 |
| 12 | 2379 | 2415 | 1304 | 1324 |
Orton large regular (LRB) cones, mounted height 2 inches. Orton publishes no slow-rate column for large cones. Cones 13 and 14 are omitted here: Orton flags its large-cone values for those two numbers as having different compositions and different temperature equivalents, and the published cone 14 figures are not internally ordered, so we would rather print nothing than print a number we cannot explain. Source: Orton Ceramic Foundation.
Free to use
Put this cone chart on your studio site
Teaching a class, running a community studio, or writing about ceramics? Copy the snippet below to embed a clean quick-reference cone chart on your own page. It is self-contained and renders anywhere. The only ask is that you keep the small credit link back here.
Click inside the box, select all (⌘A / Ctrl-A), and copy. Temperature data credited to the Orton Ceramic Foundation.
Firing ranges, labeled
Range names like “mid-range” are studio and industry convention, not an Orton standard. The cone temperatures below are Orton's; the range boundaries are how clay and glaze manufacturers actually rate their products, so each row names the manufacturer it comes from rather than pretending the label is universal.
| Range | Cones | °F (at 108°F/hr) | Where the boundary comes from |
|---|---|---|---|
| Glass fusing and enameling | Below the cone range | Roughly 1000 to 1500°F | Glass is scheduled by temperature, not by cone. Bullseye Glass writes its schedules entirely in °F and °C. |
| Raku glaze firing | Around cone 06 to 05 | 1828 to 1888°F | AMACO publishes cone 05 (1911°F) for its raku glaze line. |
| Bisque firing | Cone 06 to 04 | 1828 to 1945°F | AMACO instructs applying its glazes to bisqueware fired to cone 04 (1945°F / 1063°C). |
| Low fire / earthenware | Cone 06 to 02 | 1828 to 2016°F | Standard Clay lists 417 Red Earthenware at C/06-02. |
| Mid-range stoneware | Cone 5 to 6 | 2167 to 2232°F | The dominant electric-kiln studio range. Laguna B-Mix 5 is a cone 5 body; Standard 306 is rated C/6-10. |
| High fire stoneware and porcelain | Cone 8 to 10 | 2280 to 2345°F | Laguna #550 Porcelain and AMACO No. 38 are cone 10 bodies. |
| Industrial and technical | Cone 11 to 14 | 2361 to 2489°F | Above most studio kilns. Orton publishes to cone 14 and PCE cones above that. |
Cone temperatures from Orton. Range boundaries attributed to the manufacturers named: AMACO, Standard Clay Company, Laguna Clay, and Bullseye Glass. Glass fusing has no cone equivalent in normal practice: Bullseye writes its firing schedules entirely in degrees, which is why that row gives a temperature window rather than a cone.
The one cone to keep in stock
Studio StapleMid-range cone 6 is the most-fired glaze cone in American electric studios. Self-supporting means the 1¾ in height and 8 degree angle are built in, so the chart above applies exactly as printed.
Which cone to use for common jobs
| Job | Cone | Why |
|---|---|---|
| Bisque firing most clay bodies | Cone 04 (1945°F / 1063°C) | AMACO instructs glazing over cone 04 bisque. Some studios bisque to 06 for more porous, glaze-hungry ware. |
| Low-fire glaze on earthenware | Cone 05 (1888°F / 1031°C) | The standard commercial low-fire glaze cone. |
| Mid-range glaze in an electric kiln | Cone 6 (2232°F / 1222°C) | The most common studio glaze firing in the US. |
| High-fire reduction glaze | Cone 10 (2345°F / 1285°C) | Classic gas-reduction stoneware and porcelain. |
| Kiln-Sitter shutoff cone | One number below your target | Orton advises placing the next cone higher in sequence on the shelf to confirm the result. |
| Checking a suspect kiln | A cone below, at, and above target | A three-cone pack shows whether the kiln overfired, underfired, or hit it. |
Always fire to the cone your clay and glaze manufacturers specify, not to a generic recommendation. The single most reliable instruction here is Orton's own: when a Kiln-Sitter shuts the kiln off, place the next cone higher in sequence on the shelf and confirm the result with a witness cone inside the kiln.
How to place and read a witness cone
Stand a self-supporting cone on the shelf where the work is, not tucked in a corner, and leave room for it to fall without touching a pot. Give yourself a view of it: a cone you cannot see through the peephole during the last stretch of a firing only tells you the story afterward, which is still useful but less so.
Orton defines the endpoint as the tip bent to a 90 degree angle, or in clock terms the tip at the 5 o'clock position, and notes the interval from the start of deformation to the tip touching the shelf is typically 15 to 25 minutes. A barely leaning cone means the kiln came up short. A cone melted into a puddle means it went well past. The most informative thing you can do in an unfamiliar kiln is set three cones together, one below your target, one at it, and one above: the pattern of which bent and which did not tells you in one firing what a season of guessing will not.
Orton also notes that reducing atmospheres affect the bending behavior of the red iron oxide cones between numbers 010 and 3, where the iron can reduce and the cone can look matte, green, or bloated, and recommends the iron-free series for reduction firings in that band. If you fire gas reduction in that range, buy the iron-free cones and use Orton's SSK columns rather than the table above.
Sources
- The Edward Orton Jr. Ceramic Foundation, “Using Orton Pyrometric Cones, Cone Numbers 022-14” (©2016). Every temperature equivalent on this page, in both scales, for all cone formats and heating rates.
- Orton Ceramic Foundation, Pyrometric Cones. Heat work vs temperature, and the statement that controllers cannot measure heat work.
- Orton, Self-Supporting Cones and Orton, Small Cones. Mounting heights, the 8 degree angle, and the small-cone offset (which differs from the printed chart, as noted above).
- AMACO Low Fire Glazes. Bisque to cone 04 (1063°C / 1945°F), glaze fire to cone 05, and the cone 05 raku glaze specification.
- Standard Clay Company and Laguna Clay. Published firing ranges for named earthenware, stoneware, and porcelain bodies.
- Bullseye Glass, Writing Firing Schedules for Fusing and Slumping. Confirms glass firing is scheduled in degrees rather than cones.
Questions
What temperature is cone 6?
Cone 6 is 2232°F (1222°C) using an Orton self-supporting cone heated at 108°F (60°C) per hour over the last 180°F of the firing. Fired slower, at 27°F per hour, the same cone bends at 2165°F (1185°C). Fired faster, at 270°F per hour, it takes 2269°F (1243°C). All three numbers are correct: a cone measures heat work, not temperature, so a slow firing needs less peak heat to bend the same cone.
What temp is cone 04?
Cone 04 is 1945°F (1063°C) for an Orton self-supporting cone at 108°F per hour. At the slow 27°F per hour rate it is 1915°F (1046°C), and at the fast 270°F per hour rate it is 1971°F (1077°C). Cone 04 is the standard bisque cone: AMACO instructs potters to apply its glazes to bisqueware fired to cone 04.
What temperature is cone 10?
Cone 10 is 2345°F (1285°C) at 108°F per hour, 2284°F (1251°C) at the slow rate, and 2381°F (1305°C) at the fast rate, using Orton self-supporting cones. Cone 10 is the classic high-fire stoneware and porcelain range.
What is the difference between cone 6 and cone 06?
They are completely different firings, and the zero is not a typo. Cones with a leading zero count downward as they get cooler, so cone 06 (1828°F / 998°C) is far cooler than cone 6 (2232°F / 1222°C). The zero series runs 022 at the cool end up through 01; then the numbers reverse and run 1 up to 14 at the hot end. Cone 022 is the coolest cone Orton publishes and cone 14 is the hottest.
Do cones measure temperature?
No. A pyrometric cone measures heat work, which is the combined effect of temperature and time. Orton states plainly that cones do not measure temperature alone: they measure the combined effect of time and temperature. That is why the same cone number has three different temperature equivalents on Orton's chart, one for each heating rate. A thermocouple and pyrometer tell you how hot it is right now; the cone tells you whether the clay and glaze actually got the heat they needed.
Do I still need cones if my kiln has a digital controller?
Yes. Orton's own position is that controllers cannot measure heat work. A digital controller reads a thermocouple, and thermocouples drift with age, sit in one spot in a chamber that is never perfectly even, and can be off by a full cone without any error message. A witness cone on the shelf, next to the work, is the only direct evidence of what your ware received. Cones are cheap; a ruined glaze load is not.
What is the difference between self-supporting, large, and small cones?
Self-supporting cones have a built-in base and stand on any flat surface. Orton states they are the correct height (1¾ inches exposed above the base) with the 8 degree bending angle already built in, which is why they are the ones to buy: mounting error is designed out. Large cones are 2 inches and small cones 15/16 inch of exposed height, and both need a plaque or holder set at 8 degrees. Small cones are primarily Kiln-Sitter cones. Orton notes that large cones mounted at 1¾ inch height should be read against the self-supporting temperatures.
How do I read a cone?
Orton defines the endpoint as the tip bent to a 90 degree angle, or the tip at the 5 o'clock position. A cone that has barely started to lean is under; a cone melted flat with its tip on the shelf is over. Orton also notes the interval from the start of deformation to the tip touching the shelf is typically 15 to 25 minutes, so a cone gives you a readable window rather than an instant.
Why does the same cone show different temperatures on different charts?
Almost always because the charts use different heating rates or different cone types and do not say so. Orton publishes three heating-rate columns for self-supporting and large cones and a single fast column for small cones, and the spread within one cone number can exceed 100°F. A chart printing one number per cone has silently picked a column. That is the reason this page prints all of them.
Are these affiliate links?
Some are. Austin Gallery is an Amazon affiliate, so if you buy through a product link on this page Amazon pays us a small commission at no extra cost to you. The chart itself is straight from the Orton Ceramic Foundation and does not change based on what anyone sells. See our full affiliate disclosure.
Keep reading
- Clay shrinkage and absorption rates: the companion reference, including how to measure your own clay and what absorption says about whether a body actually matured at the cone you fired it to.
- The best kilns for pottery, glass and ceramics: which kilns reach which cones, and why programmable control is the feature that matters.
- The best pottery wheels: the other half of a working studio.
- Gifts ceramicists actually use: a cone pack is genuinely one of them.
- Pottery classes in Austin: fire in someone else's kiln first if you can.
All cone temperature equivalents are published by The Edward Orton Jr. Ceramic Foundation (©2016 Orton Ceramic Foundation) and are reproduced here with the heating rate and cone format stated for each value. Orton notes these tables are a guide for cone selection and that actual bending temperature depends on firing conditions; cones measure heat work rather than temperature, so a chart value is a starting point and every potter should verify with witness cones in their own kiln. Compiled by the Austin Gallery editors, August 2026. Austin Gallery may earn a commission from product links on this page at no cost to you.