Reference · Updated November 2026
How to wedge clay
Ram's head, spiral, and stack and slam compared, with the counts published studio references actually give, the air bubble test, reclaimed clay, and the table you wedge on.
By Travis Moher · Published November 17, 2026
Wedge each lump with at least 20 ram's head pushes, the minimum Vince Pitelka gives in Clay: A Studio Handbook, or at least 30 stack-and-slam cycles when you are blending clays, Michael Wendt's count. Then cut the lump in half with a wire: a smooth face with no holes and no streaks means it is ready to throw. Spiral (cone) wedging does the same job faster on bigger lumps once you have the motion. The point of all three is the same: one even consistency, no air pockets, and no hard or soft spots.
The 20-push minimum
Pitelka's instruction for ram's head wedging is to repeat the push “at least twenty times for each lump of clay.” Each push smears the bottom of the lump against the table, and thorough wedging creates a spiral twisting and stretching through the whole lump that evens out moisture and composition and removes air. Twenty is a floor, not a target. Clay that came out of a bag unevenly, or clay you have just rewetted, needs more, and the wire cut tells you when to stop.
Wedging methods compared
| Method | Best for | Batch | How many | Notes |
|---|---|---|---|---|
| Ram's head | Learning; everyday throwing balls | A ball about the size of a large grapefruit | At least 20 pushes per lump | Push 3 to 4 inches (8 to 10 cm) down and away, roll back, repeat. Grip the ends, never from above. |
| Spiral (cone) | Larger amounts once ram's head is comfortable | Larger lumps than ram's head handles | Until the spiral shows on the face; no fixed count | Pitelka calls it more effective. Wendt found 2 minutes still left visible color streaks in a two-color test. |
| Stack and slam (wire wedging) | Blending clays, moisture levels, or additives; sore wrists | Wendt rarely wedges under 3 lb (1.4 kg) | At least 30 cycles | Each cut and stack doubles the layers: 30 cycles is over 1 billion. |
| Cut and stack | Mixing in grog or colorants | Any | About 20 cycles for a mug | Digitalfire's count for about 1 million layers. |
Sources: Vince Pitelka, Clay: A Studio Handbook (ram's head and spiral); Michael Wendt via Ceramic Arts Network (stack and slam); Digitalfire (cut and stack). Metric conversions are ours.
Ram's head wedging, step by step
- Start with a ball about the size of a large grapefruit on a sturdy surface in front of you. Pitelka's starting size for learning either hand method.
- Hold your hands as if to shake hands, wrapped around either side of the ball. Press down and push the ball away from you 3 to 4 inches (8 to 10 cm) without letting it roll, so the underside smears against the table.
- Roll the lump back toward you, standing it up on the smeared extension. Grip it again on the sides and push down and away.
- As it turns cylindrical, keep gripping by the ends, not from above. Pitelka is specific: grabbing from above folds the clay on itself and traps air.
- If the lump stretches sideways, slap your palms against the ends to narrow it. It should hold its size and shape.
- Repeat at least 20 times, then wire-cut to check.
Spiral (cone) wedging
Pitelka describes spiral wedging as more effective than ram's head and able to handle larger quantities at a time, and suggests learning it after ram's head is comfortable. Start with a lump tapered into a cone of about equal height and width, lying on its side. One hand pushes on the flat end, the other on the curved side, and each push smears the pointed end. With repetition the smeared tail travels around the rim, circulating clay through the lump in a continuous spiral. The finished lump shows a characteristic spiral pattern on its face, and an experienced wedger's lump seems to bounce off the table on each release.
The limit of spiral wedging is blending. In Wendt's two-color comparison, two minutes of spiral wedging still left visible streaks of unmixed clay. For mixing two bodies, two moisture levels, or additives, switch to stack and slam.
Stack and slam: the blender
Wendt's method: block the clay into a rough rectangle, cut it in half on a wire, stack one half on the other without dimpling either face, roll the stack over, and slam it back to its original thickness. Repeat at least 30 times, then roll it into a cylinder with the layers parallel to the wheel head. Pitelka calls stack and slam by far the most effective way to blend clays of different composition or moisture, and the gentlest on sore joints.
The reason it blends so well is doubling. Every cut and stack doubles the layer count:
| Cycles | Layers |
|---|---|
| 10 | 1,024 |
| 20 | 1,048,576 |
| 30 | 1,073,741,824 |
Layer counts as published by Wendt (2 to the power of the cycle count). Digitalfire uses the same math for its cut-and-stack recommendation of about 20 cycles for a mug.
The air bubble test
Cut the wedged lump in half with a taut wire and look at both faces. You want a smooth, uniform face with no pockets, no holes, and no swirls of a different shade or stiffness. If you see any, press the halves back together and keep wedging. For students, Ceramic Arts Network's teaching material uses a two-color test: wedge two differently colored clays together until the clay is no longer marbled, and you have learned what “enough” looks like.
What wedging actually needs
Prices checked November 17, 2026. Affiliate links, so we may earn a commission at no cost to you.
 KALIONE steel wire clay cutterabout $6The tool for the air bubble test and for stack-and-slam wedging. Any taut wire with handles does the job.View on Amazon →
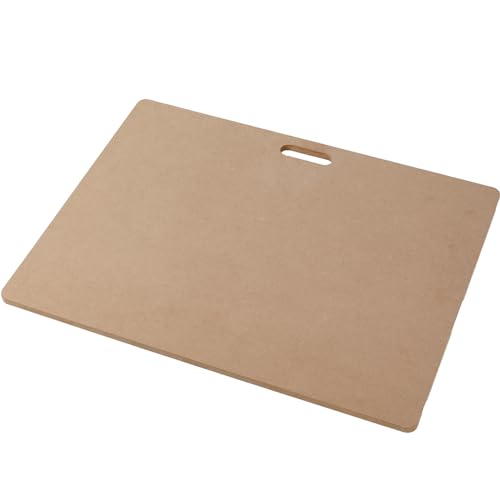 CALPALMY portable clay wedging board, 24 x 18 inabout $29A portable board for a home setup. Set it on a sturdy, immovable table at the height described below.View on Amazon →
Wedging reclaimed clay
Reclaim fails at the wedging table when the slop was never fully broken down. Ceramic Arts Network's recycling guide is blunt about it: keep water over the scraps until everything is saturated, because lumps or dry bits in the slop leave hard and soft spots in the finished clay.
- Slake the scraps completely under water. No mixer is needed if you give it time.
- Spread the slop on plaster bats, a plaster wedging table, or a large plaster slab, about 2 inches (5 cm) thick at most.
- Flip it periodically. It is ready to flip when it pulls away from the plaster easily.
- When it is firm enough to handle, stack and slam it. Reclaim is the textbook case of clay with uneven moisture, which is the job Pitelka says that method does best.
Pitelka also gives the fixes in both directions: clay that is too wet can be wedged on a dry plaster slab to stiffen it, and clay that is too stiff can be wrapped in soaking wet rags in a bag or barrel overnight to soften.
The wedging table: height and surface
Height decides whether wedging is a back-and-legs job or a wrist job. Pitelka's check: stand straight with your arms hanging relaxed at your sides and your fingers bent. Your knuckles should barely touch the wedging surface. Effective wedging uses the muscles in your back, hips, and legs, and that only works at the right height. The table also needs to be sturdy and immovable, since you are leaning your weight into it.
| Surface | What it does |
|---|---|
| Plaster | Absorbs water, so it stiffens soft clay and dries reclaim. Keep it clean and chip-free: plaster contamination causes lime pops, a hazard Pitelka's handbook covers by name. |
| Canvas over a solid top | A canvas-covered wedging table is one of the three surfaces Pitelka recommends. |
| Concrete | Sturdy and immovable. Listed by Pitelka with plaster and canvas. |
Exceptions and distinctions
- Wedging is not kneading. Pitelka draws the line clearly: bread kneading folds air in, and wedging exists to get air out. Every push should smear the bottom without folding the top over.
- Air bubbles do not blow up pots. Sue McLeod's Ceramics Monthly column: only water leads to explosions. A bubble matters in the kiln only if it holds moisture. Dry the work and fire slowly; see our bisque firing schedules for the candling step.
- Bagged clay still benefits. Digitalfire notes that wedging removes pugmill laminations, which can later cause drying and firing cracks, aligns clay particles so the lump centers more easily, and helps hand-built pieces dry evenly and warp less.
- Hand-builders wedge too. Pitelka notes that every air bubble provides the start of a fracture or separation. Our slab roller guide covers the next step.
- Orientation matters, not just count. Wendt rolls the finished stack-and-slam block into a cylinder with its layers parallel to the wheel head before throwing.
Free to use
Put this wedging chart on your site
Teaching a wheel class or posting a studio how-to? Copy the snippet below to embed the wedging counts chart. It is self-contained and renders anywhere. The only ask is that you keep the small credit link back here.
Click inside the box, select all (⌘A / Ctrl-A), and copy.
Sources
- Vince Pitelka, Clay: A Studio Handbook, second edition (excerpt via Ceramic Arts Network). Ram's head and spiral technique, the 20-push minimum, table height and surfaces, wet and stiff clay fixes.
- Michael Wendt, “Stack and Slam Wire Wedging,” Ceramic Arts Network. The 30-cycle count, layer math, 3 lb batches, and the spiral comparison.
- Tony Hansen, Digitalfire, “Wedging”. Purpose of wedging, pugmill laminations, cut-and-stack cycles.
- Sue McLeod, “Techno File: Air Bubble Myth,” Ceramics Monthly. Why water, not air, causes kiln explosions.
- Jonathan Kaplan, “Recycling Clay,” Ceramic Arts Network and Jeni Hansen Gard, “How to Wedge Clay Properly”. Reclaim drying and the two-color wedging test.
Questions
How many times should you wedge clay?
At least 20 pushes per lump for ram's head wedging, the minimum Vince Pitelka gives in Clay: A Studio Handbook. For stack-and-slam wire wedging, Michael Wendt repeats the cut and slam at least 30 times. Digitalfire suggests about 20 cut-and-stack cycles for a mug, which makes about 1 million layers. Then cut the lump in half with a wire: if the face is smooth with no holes or streaks, it is ready.
What is the difference between ram's head and spiral wedging?
Ram's head uses both hands on either side of the lump, pushing it down and away 3 to 4 inches and rolling it back, which makes a lump shaped like a ram's head with two curled ends. Spiral or cone wedging pushes one end of a cone-shaped lump so the clay circulates in a continuous spiral. Pitelka calls ram's head easier to learn and spiral more effective, and spiral handles larger quantities of clay at once.
How do you check clay for air bubbles?
Cut the wedged lump in half with a taut wire and look at both cut faces. Holes, pockets, or streaks of different color or moisture mean it needs more wedging. Ceramic Arts Network's teaching test is to wedge two different colored clays together: wedging is sufficient when the clay is no longer marbled.
Do air bubbles make pottery explode in the kiln?
No, water does. Sue McLeod's Ceramics Monthly column calls the air bubble explanation a causation and correlation mix-up: enclosed air does not cause explosions, but it can trap moisture, and steam expands to over 1,500 times the volume of liquid water. Dry work fully and fire slowly through the boiling point. Wedge out bubbles because they cause problems on the wheel and in the wall, not as kiln insurance.
How do you wedge reclaimed clay?
Dry the slop on plaster first, in a layer about 2 inches (5 cm) thick at most, flipping it when it pulls away from the surface easily, per Ceramic Arts Network's recycling guide. Then use stack-and-slam wedging, which Pitelka calls by far the most effective method for blending clay of different moisture content. Reclaim made from slop that was not fully broken down will have hard and soft spots, so slake it completely first.
What height should a wedging table be?
Low enough to use your body weight. Pitelka's test: stand straight with your arms hanging relaxed at your sides and your fingers bent; your knuckles should barely touch the wedging surface. Pitelka's point is that effective wedging uses the muscles of your back, hips, and legs, which needs a bench at that height.
What is the best surface for wedging clay?
A sturdy, immovable plaster, concrete, or canvas-covered table, per Pitelka. Plaster pulls water out of soft clay, which helps stiffen clay that is too wet. Keep plaster surfaces clean and chip-free, since bits of plaster in clay cause lime pops after firing.
Are these affiliate links?
Some are. Austin Gallery is an Amazon affiliate, so if you buy through a product link here Amazon pays us a small commission at no extra cost to you. Every count and method on this page is attributed to its published source. See our full affiliate disclosure.
Keep reading
- The best pottery wheels for beginners: where a well-wedged ball goes next.
- The best pottery tool sets: most include the wire you need for the bubble test.
- Clay shrinkage and absorption rates: what happens to that clay after it leaves the table.
- Pottery classes in Austin: the fastest way to learn the spiral is to watch it.
Counts and techniques are attributed to the published sources above; where sources give different counts for different methods, each is shown with its source rather than averaged. Compiled by the Austin Gallery editors, November 2026. Austin Gallery may earn a commission from product links on this page at no cost to you.
Cite this guide
Writers, framers, designers and students are welcome to quote this page. If you use one number, use this one:
Vince Pitelka's Clay: A Studio Handbook calls for at least 20 ram's head pushes per lump, and Michael Wendt's stack-and-slam method calls for at least 30 cycles.
Suggested citation:
Austin Gallery, "How to Wedge Clay: Ram's Head, Spiral, and the 20-Push Minimum," updated November 2026. https://www.austingallery.org/blog/how-to-wedge-clay
More free charts: the Austin Gallery reference library.