How to · Reference chart
Grid method drawing
How to scale any photo or sketch onto paper or canvas with a grid: the steps, a grid size chart for common sizes, the diagonal variant, and how to get the lines back out in every medium.
By Travis Moher · Published October 28, 2026
The quick answer
The grid method divides your reference and your canvas into the same number of squares, then you copy the image one square at a time. A 4 x 6 in photo with 1 in squares scales to a 16 x 24 in canvas with 4 in squares, because 16 / 4 = 4. Canvas square = reference square x scale factor.
The method is old. The Getty Museum calls it squaring: both surfaces are ruled off into an equal number of squares, and the lines inside each square are transferred freehand to the matching square on the new surface (Getty glossary). Studios used it to move small drawings onto big canvases and walls long before projectors existed. It still works for the same reason: a whole face is hard to copy, but one square holding a corner of an eye and part of a brow is easy.
Grid method step by step
- Match the shapes. Your reference and canvas need the same aspect ratio. Divide each side of the canvas by the matching side of the reference. If both answers match, you are set. If not, crop the reference to the canvas shape first (see the worked example below).
- Pick a square size for the reference. Choose a size that divides both sides evenly. On a 4 x 6 in photo, 1 in squares give a 4 x 6 grid. Use 1/2 in squares for a detailed portrait.
- Grid the reference. Work on a print or a photocopy, never the original. Rule the lines in pen. A clear graph ruler keeps them square to the edge.
- Grid the canvas. Multiply the reference square by the scale factor. At 4x, 1 in becomes 4 in. Mark every 4 in along all four edges, then join the marks. Use a light HB or 2H line.
- Label both grids. Letters across the top, numbers down the side, on both. A1 on the photo is A1 on the canvas. This one step prevents most copying mistakes.
- Copy one square at a time. Note where each line enters and leaves the square edge, as a fraction of the side (a third down, halfway across). Place those points, then join them. Cover the rest of the photo with paper if the full image distracts you.
- Check the big shapes. Step back after every few squares. A proportional divider set to your scale factor checks any measurement in seconds.
- Remove the grid. Erase or cover the lines, depending on your medium (table below).
Grid size chart
These pairs share the same aspect ratio, so the grid divides evenly with no crop. Every value is arithmetic: scale factor = canvas side / reference side, and canvas square = reference square x scale factor.
| Reference | Canvas | Scale | Reference square | Canvas square | Grid |
|---|---|---|---|---|---|
| 4 x 6 in photo | 8 x 12 in | 2x | 1 in | 2 in | 4 x 6 squares |
| 4 x 6 in photo | 12 x 18 in | 3x | 1 in | 3 in | 4 x 6 squares |
| 4 x 6 in photo | 16 x 24 in | 4x | 1 in | 4 in | 4 x 6 squares |
| 4 x 6 in photo | 24 x 36 in | 6x | 1/2 in | 3 in | 8 x 12 squares |
| 5 x 7 in photo | 10 x 14 in | 2x | 1 in | 2 in | 5 x 7 squares |
| 8 x 10 in print | 16 x 20 in | 2x | 1 in | 2 in | 8 x 10 squares |
| 8 x 10 in print | 24 x 30 in | 3x | 1 in | 3 in | 8 x 10 squares |
| 9 x 12 in sketch | 18 x 24 in | 2x | 1.5 in | 3 in | 6 x 8 squares |
| 9 x 12 in sketch | 36 x 48 in | 4x | 1.5 in | 6 in | 6 x 8 squares |
| 12 x 16 in sketch | 18 x 24 in | 1.5x | 2 in | 3 in | 6 x 8 squares |
| 11 x 14 in print | 22 x 28 in | 2x | 1 in | 2 in | 11 x 14 squares |
| 20 x 30 cm photo | 40 x 60 cm | 2x | 2.5 cm | 5 cm | 8 x 12 squares |
Need a canvas that matches your photo? Our standard canvas sizes chart lists every stock size, and the canvas aspect ratio guide groups them by shape so you can find one that fits a 2:3 or 4:5 photo without cropping.
Scaling math with a worked example
When the shapes match
Photo: 4 x 6 in. Canvas: 16 x 24 in. Short sides: 16 / 4 = 4. Long sides: 24 / 6 = 4. Both are 4, so the scale is 4x. Grid the photo in 1 in squares (4 across, 6 down). Grid the canvas in 4 in squares (4 across, 6 down). Same 24 squares, four times bigger.
When the shapes do not match
Photo: 4 x 6 in (2:3). Canvas: 16 x 20 in (4:5). Short sides: 16 / 4 = 4. Long sides: 20 / 6 = 3.33. The numbers differ, so a straight grid would stretch the image. Use the smaller factor or crop. Cropping is usually better: trim the photo to 4 x 5 in (cut 1 in off the long side), and now 16 / 4 = 4 and 20 / 5 = 4. Grid the cropped photo in 1 in squares and the canvas in 4 in squares.
Squares that do not divide evenly
Sometimes the canvas square comes out awkward, like 2.67 in. Work backward from the canvas instead. Pick an easy canvas square (3 in), count how many fit (a 24 in side holds 8), then divide the reference side by the same count (6 in / 8 = 3/4 in). Both grids have 8 squares on that side, which is all that matters.
Printable spec
Copy this grid spec
Fill in your own sizes and tape it next to your easel. The example is the 4 x 6 in to 16 x 24 in job above.
The diagonal grid method
A diagonal grid adds lines from corner to corner through each square, so every square becomes four triangles. You get more reference points without making the squares smaller, which matters on curves, eyes, hands, and anything set at an angle. Two common versions:
- Square plus diagonals. Draw the normal grid, then add an X through only the busy squares. Less to erase than diagonals everywhere.
- Diagonals only. Skip the square grid and rule diagonal lines in both directions, making a diamond lattice. Some artists find the diamonds less likely to make them draw blocky, square-shaped forms.
The math does not change. Diagonals connect the same corners on both grids, so they scale automatically.
How to erase grid lines by medium
| Medium | Grid with | How to remove or hide it |
|---|---|---|
| Graphite on paper | Light HB or 2H line, drawn with almost no pressure | Lift with a kneaded eraser by pressing and rolling, not scrubbing. Lift each square's lines as you finish it, before you lay in dark tone over them. |
| Charcoal or pastel | Very light pencil or vine charcoal | Lift with a kneaded eraser before heavy layers go down. Once a square is built up, any remaining line is buried under the dry media. |
| Watercolor | Light pencil, few lines | Erase the grid before you paint. A dried wash locks graphite underneath it, so a line you leave is a line you keep. |
| Acrylic on canvas | Pencil, charcoal, or transfer paper line | Opaque paint covers it. If you plan thin, watery layers, seal the drawing first with a thin coat of gesso or acrylic medium so lines do not smear or show. |
| Oil on canvas | Charcoal or thinned paint line | Knock charcoal back with a rag, then paint over it. If you fix it, spray lightly: a heavy fixative coat can interfere with oil paint adhesion. |
| Digital (tablet) | Grid on its own layer | Hide or delete the grid layer. Nothing to erase. |
Two notes behind the table. On fixative under oil, John Bickford of The Artist's Magazine advises a light spray only, since oil paint needs to bond with the ground and a heavy coat can seal it (Painting Over a Fixative). On transfer paper, Saral's wax-free sheets leave no wax residue, so the line erases like pencil (product description). Waxy carbon-style papers do not erase cleanly and can resist paint.
What you need
A pencil and a straight edge are enough to start. These make it faster and cleaner. Affiliate links, so we may earn a commission at no cost to you.
 Westcott B-85 18 in 8ths Graph Beveled RulerA clear ruler with a printed graph lets you square every line to the edge without a T-square. 18 in reaches across most canvases up to 18 x 24. About $11.Check price →
 Accurasee Artist 11 Inch Proportional DividerSet it to your scale factor and it transfers any single measurement from photo to canvas. The fast way to check a square without counting. About $10.Check price →
 Saral Wax-Free Graphite Transfer Paper, 12 1/2 in x 12 ft RollFor the final step: draw at full size on paper, then transfer it to canvas. Wax-free, so lines erase like pencil. About $19.Check price →
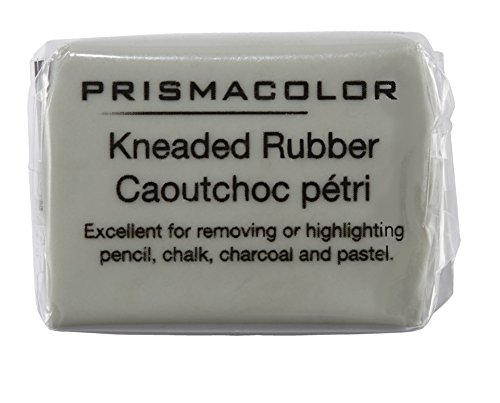 Prismacolor Premier Kneaded Rubber Eraser, MediumLifts grid lines off paper without scuffing the surface. Press and roll; do not scrub. About $5.Check price →
Grid method vs projector vs light box vs transfer paper
| Method | Best for | You need | Drawing skill used | Main limit |
|---|---|---|---|---|
| Grid method | Any size, any ratio | Pencil and ruler | High: you draw every line | Slow on big or busy images |
| Art projector | Large walls and canvases | Projector, dim room | Low: you trace | Needs darkness; keystone distortion if not square to the wall |
| Light box | Up to the light box size, paper only | Light box | Low: you trace | Does not work through canvas or heavy paper |
| Transfer paper | Same size only (1:1) | Transfer sheet and stylus | Low: you trace | No scaling; you need a full-size print first |
| Drawing tablet | Any size, digital | Tablet and app | Medium | Ends on screen, not canvas, unless printed |
Many artists combine them: grid a full-size drawing on paper, then move it to canvas with transfer paper so the canvas never sees a grid line. For murals and very large work, a projector saves hours; see our best art projectors for tracing. For paper-to-paper tracing, a light box is the cleanest option. And if you work digitally, every drawing app can lay a grid on its own layer; our drawing tablet guide covers the hardware.
Ready to shop?
Faster ways to get a drawing onto the surface, and the canvas to put it on.
Free to use
Put this grid size chart on your site
Teaching a drawing class or writing a tutorial? Copy the snippet below to embed the grid size chart on your own page. It is self-contained and renders anywhere. Please keep the small credit link.
Click inside the box, select all (⌘A / Ctrl-A), and copy.
Common grid method mistakes
- Mismatched shapes. A 2:3 photo on a 4:5 canvas stretches everything. Crop first.
- Unlabeled grids. Losing your place by one square shifts a whole feature. Label rows and columns on both.
- Heavy canvas lines. A grid you can see from across the room is a grid you will fight under thin paint.
- Copying objects instead of lines. Draw what crosses the square, not the nose you know is there.
- Gridding the original. Always work on a print or copy of the reference.
Sources
- J. Paul Getty Museum, Glossary: Squaring. Definition of the method: equal squares on both surfaces, lines copied freehand square by square.
- John Bickford, “Painting Over a Fixative,” The Artist's Magazine. Light fixative spray only under oil, since a heavy coat can seal the ground.
- Saral Wax Free Transfer Paper, product description (eQuilter). No wax residue, erases like pencil, works on canvas and paper.
- Grid sizes and scale factors on this page are arithmetic (canvas side / reference side), not quoted from a third party.
Questions
What size grid should I use for the grid method?
Pick a square size that divides both sides of your reference evenly, then multiply it by your scale factor for the canvas. A 4 x 6 in photo with 1 in squares becomes a 16 x 24 in canvas with 4 in squares at 4x. Smaller squares mean more accuracy and more lines to erase. For a detailed face, use half-size squares or add diagonals.
How do I calculate the scale for the grid method?
Divide the canvas side by the matching reference side. A 16 in canvas side over a 4 in photo side is 4, so the scale is 4x and every 1 in square on the photo becomes a 4 in square on the canvas. Check the other side gives the same number (24 / 6 = 4). If it does not, the shapes differ and you have to crop one of them first.
Is using the grid method cheating?
No. Squaring is a centuries-old studio method: the Getty Museum defines it as ruling both surfaces into an equal number of squares and copying the lines square by square, freehand. You still draw every line yourself, which is why it trains your eye in a way tracing does not.
What is the diagonal grid method?
It is a grid with diagonal lines drawn corner to corner through each square, or a grid made only of diagonals. The diagonals cut each square into triangles, which gives you more reference points for curves and angled features without shrinking the squares.
How do I get rid of grid lines after drawing?
On paper, draw the grid very lightly and lift it with a kneaded eraser square by square. In watercolor, erase before you paint. Under opaque acrylic or oil the paint covers the lines; for thin paint, seal the drawing first with a thin coat of gesso or medium.
Is the grid method better than a projector?
They do different jobs. A projector is faster for large walls and murals but you are tracing, it needs a dark room, and the image distorts if the projector is not square to the surface. The grid works at any size in daylight with a pencil and ruler, and it builds drawing skill.
Keep reading
- Standard canvas sizes: every stock size in inches and centimeters.
- Canvas sizes by aspect ratio: match a canvas to your photo.
- How to stretch a canvas: build the surface before you grid it.
- Best art projectors for tracing: the fast route for murals.
Written by Travis Moher for Austin Gallery, October 2026. Grid sizes are calculated, not measured. Austin Gallery may earn a commission from product links on this page at no cost to you. See our affiliate disclosure.